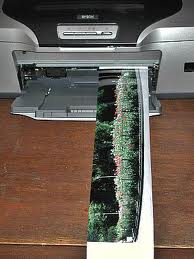
Anyone having a color printer at house can take printout of their digital pictures from the convenience of their home only. Panoramas may come in an odd shape, if you try to print on letter size or standard A4 size, but might end up with getting a letter box shape across the frame. Most of the space in the frame might look blankor probably you want to print a bigger photo. Make use of following tips to print panorama at home rather than purchasing expensive larger printers. Inkjet printers are dedicated to the task of panoramic photo printing.
The pictures can be adjusted and special effects can be added; another good thing is that it allows users to print pictures across multiple pages. You’ll have to carefully add in crop marks, and glue the pages together to form one big printout.
It isn’t hard to capture and store memories as digital snaps with Windows 8, as it is as easy as moving your memories into amazing photo albums or scrapbooks. If you want to create professional looking prints at house, here are some hints, which will help you make sharper and attractive results.
Increase Image Resolution
The finest photos always yield to best prints and you should enhance the quality by following these tips. First of all, maximize the photo resolution to get better image. If you’ve digital camera, you can set the resolution of your choice and read the manual to check out how to adjust the picture resolution. For premium result, choose the maximum available photo quality and size. For 2MP camera, you can choose album sized or wall sized (2.5 to 6in) print and if you are using 3MP, minimum resolution needed is 5x7inches. Choose higher resolution for 8 or 10MP cameras that provide attractive panoramic printing. The more you maximize the resolution, the more you get clarity and detailed prints.
Selecting the Correct Format
Choose the correct JPEG file format that compress picture data, enabling to post them on web or emailing photos. You can as well choose TIFF images, as they are superior, crisper, and smoother in comparison to JPEG.
Edit and Improve Pictures
You can make use of photo gallery to soften the edges and add some special effects, using lighting and can also remove blemishes, red eyes, and enhance background to touch up your images. These are just a few methods to add special effects to improve your snapshots. You can also merge your panorama images with Photo Fuse and Microsoft Photo-Synth to transform the pictures into 3D scenes.
Get the Right Printer
You can improve the quality of the print by configuring the printer for best results; the printer makers often revise their software interpreters and hence you should make use of the most current driver in order to get the high picture quality and peak performance. It is suggested to have a check on maker’s website regularly to install the latest downloadable updates.
Choose the Right Paper and Ink
You can enhance the photo prints by choosing the right ink and paper, which perfectly complements your pictures. You need not go for standard printer papers all the time, but rather can select matte finish or flashy paper that looks best on black and white prints. Before placing pictures in frame or album, allow the ink to dry for 6 to 12 hours.
If you follow the above tips, you won’t be facing much problem in printing panorama at your home.

